Kitchen Island Ideas: Design Yours to Fit Your Needs
Posted in Angelcityfurniture
For a lot of my clients, no kitchen design is complete without a kitchen island at its center. The island has become the icon of the modern kitchen—the 21st-century equivalent of the old-fashioned hearth. It's easy to understand why.
Why Build a Kitchen Island?
First, islands work. Because they can be accessed from all sides like the old kitchen table, they're ideal for a variety of kitchen tasks (see "Uses for a Kitchen Island," below).
Second, these freestanding pieces instantly become the focal point of a kitchen because they can have the look and feel of furniture rather than components in a domestic laboratory.
Related How to Build a Breakfast Bar
Third, islands help kitchens adjust to some of the big changes in American life in the past few decades. In June Cleaver's 1950s kitchen, all the appliances and cabinets were tacked to the walls of a closed-in room. Today's kitchens are not only open to other rooms but they also have to accommodate multiple cooks, kids doing homework, and even party guests.
A well-designed island offers a place for people to congregate while at the same time separating those who are cooking and cleaning from those who are just hanging out.
When planning an island, here are the key points to consider.
Uses for a Kitchen Island
Islands have to work to make them earn the space they occupy. Here are the four things islands can do and some design suggestions for each function. (If you want an even more in-depth review, read our “All About Kitchen Islands” article.)
Cleanup
Clearance for the dishwasher door in the open position.
Pull-out garbage and compost bins next to the sink.
Easy access to dish and silverware storage.
Storage for dish towels, dish soap, etc.
Dual-height counters to hide dirty dishes from view.
Food Prep Space
Outlets for small appliances.
Refrigerator and cooktop close by.
Access to compost bin or disposer.
Prep sink and butcher-block counters are good additions.
Cooking
Heat-resistant countertop (stone, tile, metal) for hot pans.
At least 18 inches of space on either side of cooktop or range.
Overhead vent hood or downdraft fan (with second exhaust fan in ceiling).
Raised eating area out of the range of spatters.
Informal Dining
Counter height/width designed for standard-size chairs/stools.
Softly contoured edge profile is most comfortable for leaning on.
Size and Placement
Kitchen islands suck space. At minimum, an island should be 4 feet long and a little more than 2 feet deep, but it must also have room for people to move and work around it. Unless your kitchen is at least 8 feet deep and more than 12 feet long, don't even think about an island. (For more on practical dimensions for islands and the minimum space around them, see "Island Minimums," above, or watch Tom Silva discuss how to size a kitchen island.)
Lighting
Where you have activity, you need light. For islands, that means dedicated lighting—you can’t count on ambient light to illuminate your workspace, and you don’t have upper cabinets to hide task lights, as you do elsewhere in the kitchen.
As with most task lighting, you want the light to come straight down onto the island. The most common choice is recessed lighting, which is relatively easy if you have standard-height ceilings but trickier with high ceilings. If the distance from the countertop to the ceiling is greater than 6 feet, you’ll need to use fixtures or bulbs specially designed to project light down rather than spread it out.
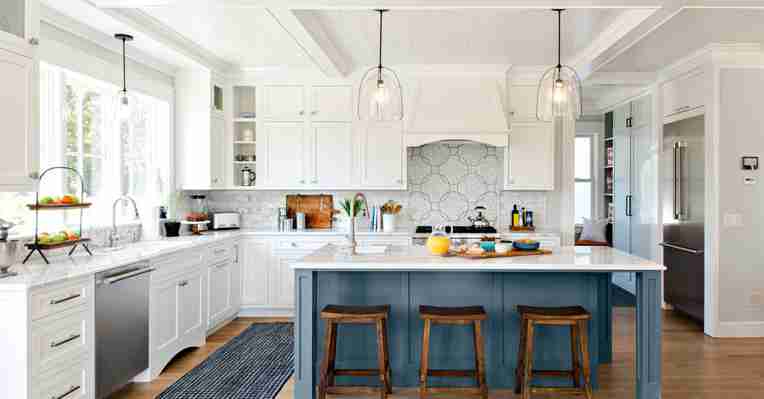
Pendant Lighting
Another option is pendant lights, which hang from the ceiling. Be careful with these, though. It’s easy to end up with them at the wrong height, which can either block your view from the island or blind you with a high-intensity bulb shining directly into your eyes. Whatever type of lighting you choose, make sure it can be dimmed when you don’t need maximum illumination for working.
Storage Space
You can gain valuable real estate on both the "working" side and the "public" side of an island for storage, always a critical need in kitchens. On the public side, take advantage of shallow cabinets (installed back-to-back, with deeper cabinets facing the kitchen) for serving items—napkins, cutlery, platters, etc.—that don't need to be in the food prep area.
On the working side, make sure there's room to store the things that are needed for the activity the island supports, because an island's strong suit is also its biggest downfall: It's isolated. If it's a cooking island, then pots, pans, and spices should be at hand. The space under cooktops is great for deep drawers for pots and pans. (The temptation is to hang them from an expensive pot rack, which won't hold deeper pots or lids and gets in the way of your view.)
If it's a prep island, don't forget storage for knives and small appliances like mixers and food processors (consider pop-ups — platforms that swing out from behind a door in the island base—or appliance garages for these), and convenient access to garbage and compost bins. If the island is going to be dedicated to cleanup, you'll need a place for dish towels, detergent, and brushes.
Undercounter storage space is limited on islands that include a sink and/or major appliances like a dishwasher or oven; you'll have to plan more carefully for those. The same is true for cooktops with downdraft fans, the machinery for which must be stored in the cabinet below. One way around this is to use the ends of the island. Round ends are perfect for lazy Susans, and almost any island end can accommodate open shelving or even a shallow cabinet.
Vent Hood
Life would be a lot easier if you could just ignore ventilating an island dedicated to cooking — but you can't. The most common scheme is to install a downdraft fan behind the cooktop; in some cooktops and ranges it's incorporated into the appliance. That solves the visual problem of an overhead hood messing up sight lines. But even the best downdraft fan is not up to the worst cooking odors. If you really want to lose the fried fish smell, include a second exhaust fan mounted in the ceiling. It will also help limit the amount of moisture condensing on the inside of your windows in the winter when you use a tall stockpot.
The other option is an overhead hood that extends up through the ceiling. Because it's exposed on all sides, it must be completely finished (read expensive), and it becomes a dominant element of the design. You can opt for manufactured versions, or get a hood custom-built and finished in just about any material. The big caution here: It's easy for the mass of a hood, placed low enough to be effective, to ruin the joy of having open space above the island.
Counter Height
Dual-height islands can create informal eating areas, hide dirty dishes, protect noncooks from splashes and splatters, and make kitchens more interesting. Here are the dimensions that make them most comfortable, useful, and pleasing.
The height of your island's eating area dictates the type of seating you'll have: A 28- to 30-inch-high counter works best with a chair; a standard-height 36-inch counter is served best by a low stool; and a 42- to 48-inch counter requires a bar stool.
Styles for Kitchen Islands
You can make an island nearly disappear to anyone not working in the kitchen by extending the "public" face of the island (the one that doesn't face the kitchen) 4 to 6 inches above the countertop and covering it in the same surface material as the rest of the interior walls.
Islands that mimic the rest of the kitchen, typically by using cabinets in the same finish and from the same manufacturer, don't call attention to themselves. Most islands in American kitchens use this scheme.
Resource
Architect
Duo Dickinson
Madison, CT
203-245-0405